
Some methods the Naked team use to make coffee – we’re yet to see whose is the best.
Just over a year ago, many of us packed our laptop bags and set up our home offices in an attempt to adapt to a new normal. We’ve come to realise that this way of working is here to stay, and have slowly started moving from the kitchen counter to a more permanent home office set-up.
But one thing that just isn’t the same at home is the coffee. At the Naked office, the coffee machine worked overtime and latte art became very competitive.
Many of us have attempted to replicate the vibe at the office with a good cup of coffee at home. We don’t know whose is best (we’ll have to have a competition one day in the office) but we thought we’d share the different ways to make a yummy cup of joe.
Moka Pot by Naadir, actuary
I use this method purely because I’m used to it. It’s quick, easy and inexpensive.
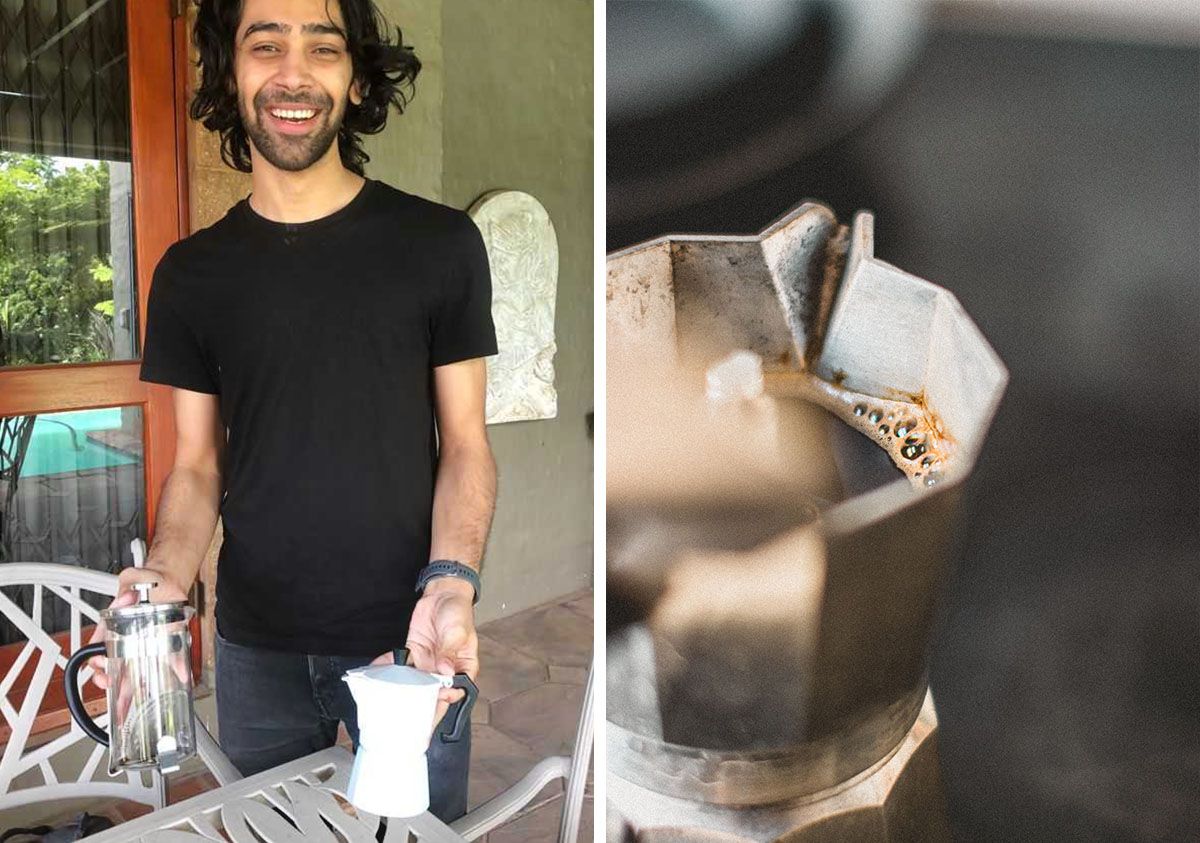
Tips to perfect it: The grind shouldn’t be too coarse, but also not as fine as an espresso grind. But if you’re like me and don’t have an electric coffee grinder at home, I usually take it to a coffee store (Industrial Coffee Works in Centurion) to grind the beans for me.
I often use Bean There coffee beans (their DR Congo range). Their beans also come pre-ground, which can make things a lot easier.
Costs: The Moka Pot cost me between R400 and R500 but there are many out there. I find it’s worth investing in a good quality one rather than having to buy another in a couple of months. Other than that, beans are quite reasonable; the DR Congo beans go for about R90 for 250g.
Plunger by Marguerite, designer
At home we use a variety of methods to make coffee; mainly plunger because it works out a little more economical. I find it’s the best method – at home at least – because it gives me a nice rounded cup of coffee. I also really enjoy the ritual that comes with making plunger coffee. Something about it helps me feel centred and calm for the day ahead.

Tips to perfect it: You want the grind of the coffee to be just right. The best way to know if you have the right grind is to make some coffee – go figure. When you press the filter down and you’re feeling a bit of resistance, the coffee grounds are too fine. If you can push the filter down with no resistance at all, then the grounds are too coarse. You want to find a sweet spot between the two.
For the beans, every brand and its origins are all so different! My favourite is a blend from Columbia, Ethiopia and Vietnam. I almost always buy it from a roaster as you’re guaranteed fresh beans. I recommend always smelling the beans after they’ve been roasted: you don’t want a batch that smells burnt. The coffee at supermarkets is usually older, so be aware if you do plan on buying from them. The beans from Woolworths are usually a safe bet and well-priced.
Here in Pretoria, there are some great options for smaller roasters, like Lucky Bread Co., Aroma, Heavenly Coffees and Cabin Coffee. Plungers are generally inexpensive and can be found in most supermarkets, homeware stores, and there are loads on Takealot.com.
Pour-over by Emily, scrum master
Working at Naked has definitely raised my standards as to what makes a good cup of coffee, so I just couldn’t go back to that instant coffee life. Once I got used to our coffee machine at the office, pour-over was just the best trade-off between spending money on equipment and getting the best-tasting cup I could at home.

I make my own pour-over at home using this pretty little pour-over maker from Le Creuset. I use my Nutribullet to grind my beans (Bean There is my jam) and it works like a charm. It’s definitely not up to the same standard as the professional ones but it does the job just fine.
Before you start, warm up your pour-over by swirling a bit of boiling water in it. I like a pretty strong cup so I use a fair amount of coffee. First, I pour just a bit of boiling water on the beans and let it run through, then I try to pour the water in as slowly as possible, in a circular motion, to get maximum infusion. Finally, I add a teeny splash of milk at the end and that’s as good as it gets for home brew for me.
Tip to perfect it: Tell the person doing the grinding that it is for a pour-over – it should be a medium-coarse grind but less chunky than a French press grind.
As for the costs, my pour-over maker was R369 (Takealot.com has great options) and a pack of filters is R30 and lasts you a while. There are some pretty cheap options for a spice/coffee grinder (+/-R300) if you don’t have another appliance in the kitchen you can use for grinding. Otherwise, there is always the option to buy pre-ground beans. The cost of the beans varies and is usually around R70 for a small bag of normal supermarket stuff and about R100 for the top-shelf stuff.
Nespresso by Jordan, developer
My fiancée and I recently got a Nespresso with a steam wand. I never knew home coffee could taste this great. Switch the machine on, choose your coffee and hit go! Make sure you try out a bunch of different pods to find your favourite.
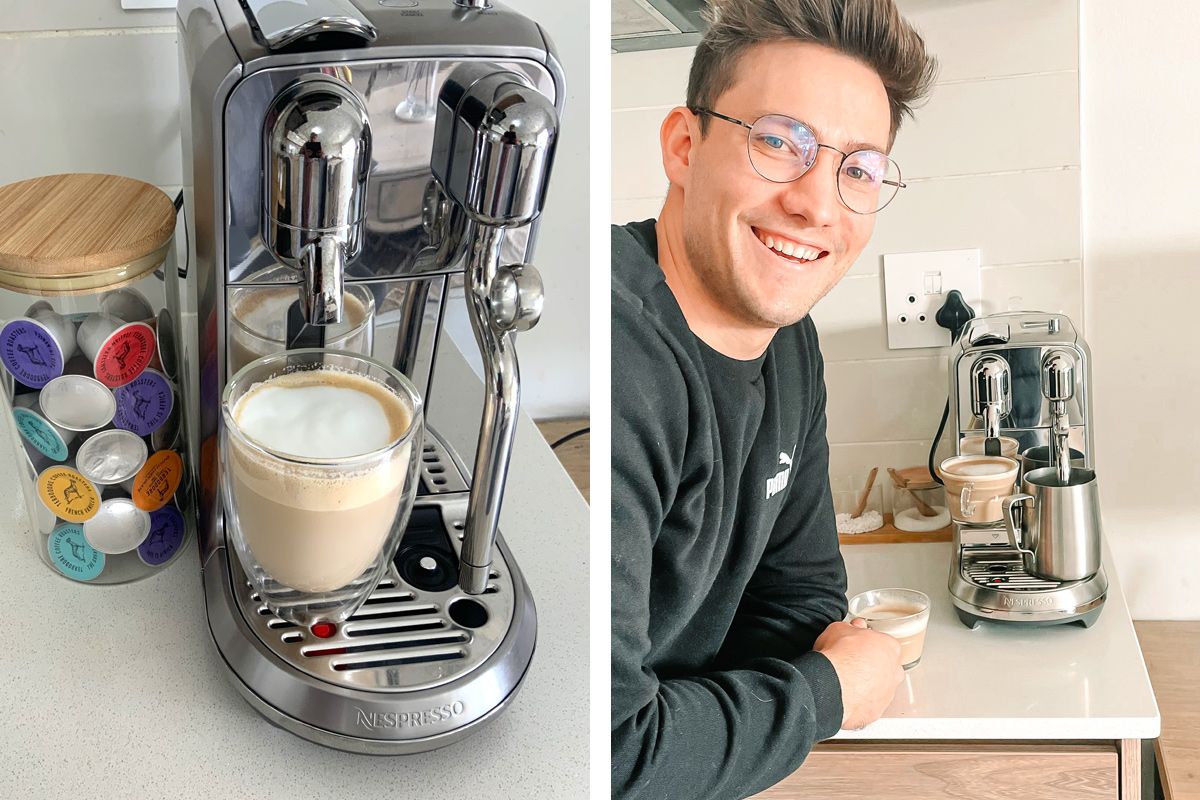
Tips to perfect it: Play with the settings until you’re happy with the milk temperature, foam texture and coffee size. It’s super easy, done in a minute and tastes just like something a barista made.
We find the official Nespresso pods taste the best, but I enjoy the Terbodore range like Italian Hazelnut, and English Toffee.
As for the costs, the pods cost between R60-R100 for 10 pods, depending on the brand. We mostly make cappuccinos with a ratio of four parts milk to one part espresso and we have about one to two cups a day, each. Nespresso has the machine listed for R8,999 – keep an eye out, it often goes on sale and you get 100 pods with it.
AeroPress by Arne, actuary
An AeroPress is a little contraption that allows you to enjoy the infusing properties of a French press but with the pressure of an espresso machine.

I learnt how to use AeroPress by watching tutorials on AeroPress.com. But I found that the “inverted brew” method works the best because if you do the normal brew, coffee drips through the filter into the cup before it’s actually ready. The “inverted” brew ensures that no half-brewed coffee drips into the cup and it’s a method that I have fun doing.

Tips to perfect it: The variable I’ve found the most important when brewing your coffee is the age of the beans. Ideally, your beans should be no more than a month old. It’s hard to get these types of beans from supermarkets, but you can get fresh beans from smaller roasters. My favourite roasters are Highland Coffee in Clarens and Maria’s Superior Coffee in Graaff-Reinet. I usually just order online.
The AeroPress isn’t exactly cheap (between R800-R900, depending where you buy it) but I find you’re paying for many good cups of coffee to come.
Bean-to-cup machine by Burt, actuary
We have a bean-to-cup machine, which is probably your more expensive option to go with. But it’s my favourite method because it makes the best cup of coffee with the least amount of effort. (Actual reason: My grandfather gave me the machine, so it’s the only option I have.)

Tips to perfect it: There are a few things that you need to play around with to figure out what you prefer – the fineness of the grind, the brewing temperature and the brewing time. There is no right or wrong, but in my opinion, the finer the grind, the better the flavour.
The best beans for the job are definitely Terbadore’s, but we often just buy from the local supermarket. The key is to make sure that the roast date is as recent as possible.
The machine is about R8,000, and the cost of the beans depends on where you buy them.
Bean-to-cup machine by Shane, creative director
As an ex-coffee shop owner, I have to have an extremely over-the-top home coffee setup! I’ve got a bright yellow La Marzocco Linea Mini that I consider a third child.

Tips to perfect it: The first skill to master when you’re learning how to use an espresso machine is how to froth milk to the perfect temperature. A good sign is that you can take a sip immediately – you shouldn’t have to blow on it... Nothing ruins an espresso like burnt milk, so get your milk game on point ASAP!
I love this way of making coffee because it reminds me of my days of serving cappuccinos and telling people the wifi password (wolveslovesyou one word all lowercase).
Best beans: I love the mom and dad of JHB coffee – Father and Motherland! And must give a shoutout to Bean There, of course!
Costs: I spend about R350 per month on beans from Father, which is enough for about five weeks of unlimited coffee. The La Marzocco Linea Mini goes for about R 72,950 🥴.
Cold-brew and bullet-proof coffee by Chris, actuary/developer
My favourite has to be a full cappuccino, due to the fun challenge of trying to perfect the process, from getting the grind and espresso right, to the milk frothing (I use MilkLab almond) and the pouring of what I tell myself qualifies as “latte art”. However, there are two methods that I’d love to share due to their lack of “mainstreamness” and the fact that there‘s not much good advice out there on how to make coffee this way. I’m talking about cold-brew coffee and the hardcore bullet-proof coffee. Dum dum dum.

I buy green beans directly from Bean There and roast them at home in small batches using a popcorn maker. Probably not the most professional roast, but always super fresh.
As for the cost, it really depends on the cost of your beans and the equipment used to make the espresso. But both methods can easily be made using pre-ground coffee, too. For the bullet-proof coffee, a decent blender (that can blend hot liquids) is required.
I love these types of coffee making because they’re both linked to my love of running. Cold brew is great when I’m waking up super early to run and don’t want to wake up the family with grinding and espresso making. It’s also great for a hot day!
Bullet-proof is something I go to when I’m in a training cycle that requires fewer carbs. You’ll be surprised to find out how much sugar/lactose is in your morning cappuccino.
Cold-brew method
Tips to perfect it: It’s super simple, but requires a bit of planning the night before. Simply grind your beans (or pre-ground if that’s what you have), scoop them into a jar (an old glass honey jar works well) and add cold water. Yip, cold! (cold-brew…). Let it brew overnight. The last step is to plunge/filter it. You can use a plunger here, but I like to use something with filter paper to clear out the grinds completely. My preferred method here is to use the AeroPress. Add milk if you wish and enjoy it cold. The flavour is amazing and totally worth the wait!
Bullet-proof method
Tips to perfect it: Onto bullet-proof coffee. The concept is strange and if you’ve heard about it, you’re probably an ultra-runner, body-builder or have played around with some sort of low-carb diet. It’s weird. Instead of milk, add some sort of oil or butter to your coffee. Eish! And to be honest, it’s also pretty gross when made wrong. Most people simply add a scoop of oil or butter to their coffee and stir, resulting in their first sip being a sip of slimy ew and thereafter a black coffee. But there’s a better way!
The trick is to use a blender. Once you’ve made your coffee (I make espresso and then add hot water), scoop a teaspoon (or more if you like) of oil/butter into the mug, stir and transfer all over to the blender. Run on high speed for 10-15 seconds and pour back into the mug. The oil/butter is now thoroughly mixed into the coffee and makes for a creamy drink.
If you don’t already have a method you use at home, we hope these give you some ideas! After all, coffee is the way our days begin, so it’s worth making a good cup.


